
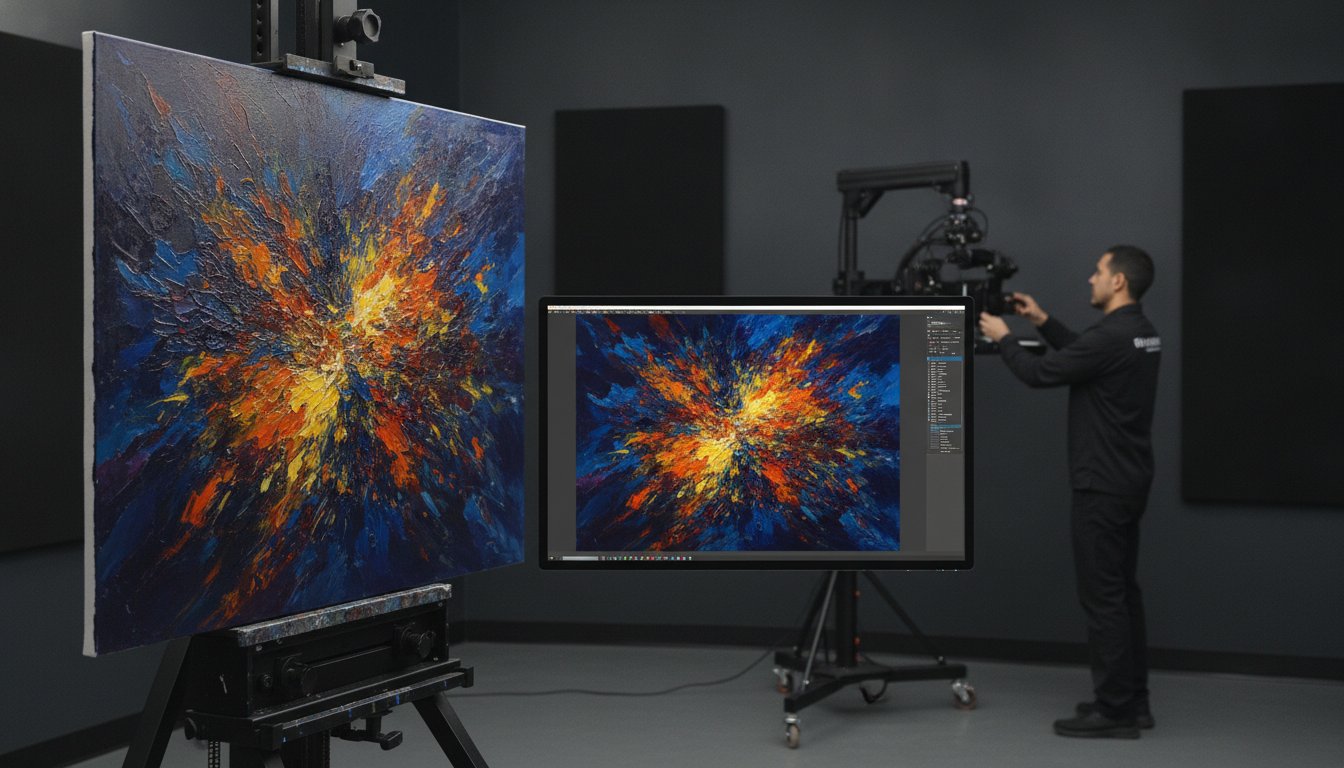
The ultimate value of your fine art prints is determined long before the ink hits the paper. If your initial capture fails to record the subtle nuances of a brushstroke or the exact depth of a shadow, the resulting Giclée will always feel like a pale imitation. Learning how to digitize artwork for printing requires more than just a high-resolution camera. It demands a systematic approach to lighting, color management, and optical precision to ensure your work translates perfectly to a digital medium.
Most artists have felt the frustration of seeing a vibrant, textured painting turn into a flat or muddy digital file. It’s discouraging when a standard camera setup produces blurry images or inaccurate colors that simply don’t match the soul of the original piece. You’ve likely spent years honing your style, and you deserve a reproduction process that respects the integrity of that craftsmanship.
This 2026 guide will help you master the technical steps and professional methods required to convert your original art into museum-quality digital files. We’ll explore the critical differences between DIY flatbed scanning and professional BetterLight technology. You’ll also learn how to apply modern standards like ISO 12234-4:2026 to achieve perfect color matching and archival-grade results for your Giclée production.
Key Takeaways
- Recognize the critical technical differences between digital files intended for social media and those engineered for archival Giclée production.
- Master the foundational techniques of how to digitize artwork for printing, from utilizing professional-grade flatbed scanners to optimizing tripod-based camera setups.
- Implement industry-standard 300 DPI resolution and specific color space settings to ensure your digital files maintain the integrity of the original piece.
- Evaluate the specialized advantages of BetterLight scanning technology for capturing extreme resolution and pure data without the artifacts found in standard digital sensors.
- Develop a precise post-processing workflow to remove surface imperfections and adjust tonal depth in preparation for museum-quality printing.
The Fundamentals of Digitizing Artwork for High-Quality Printing
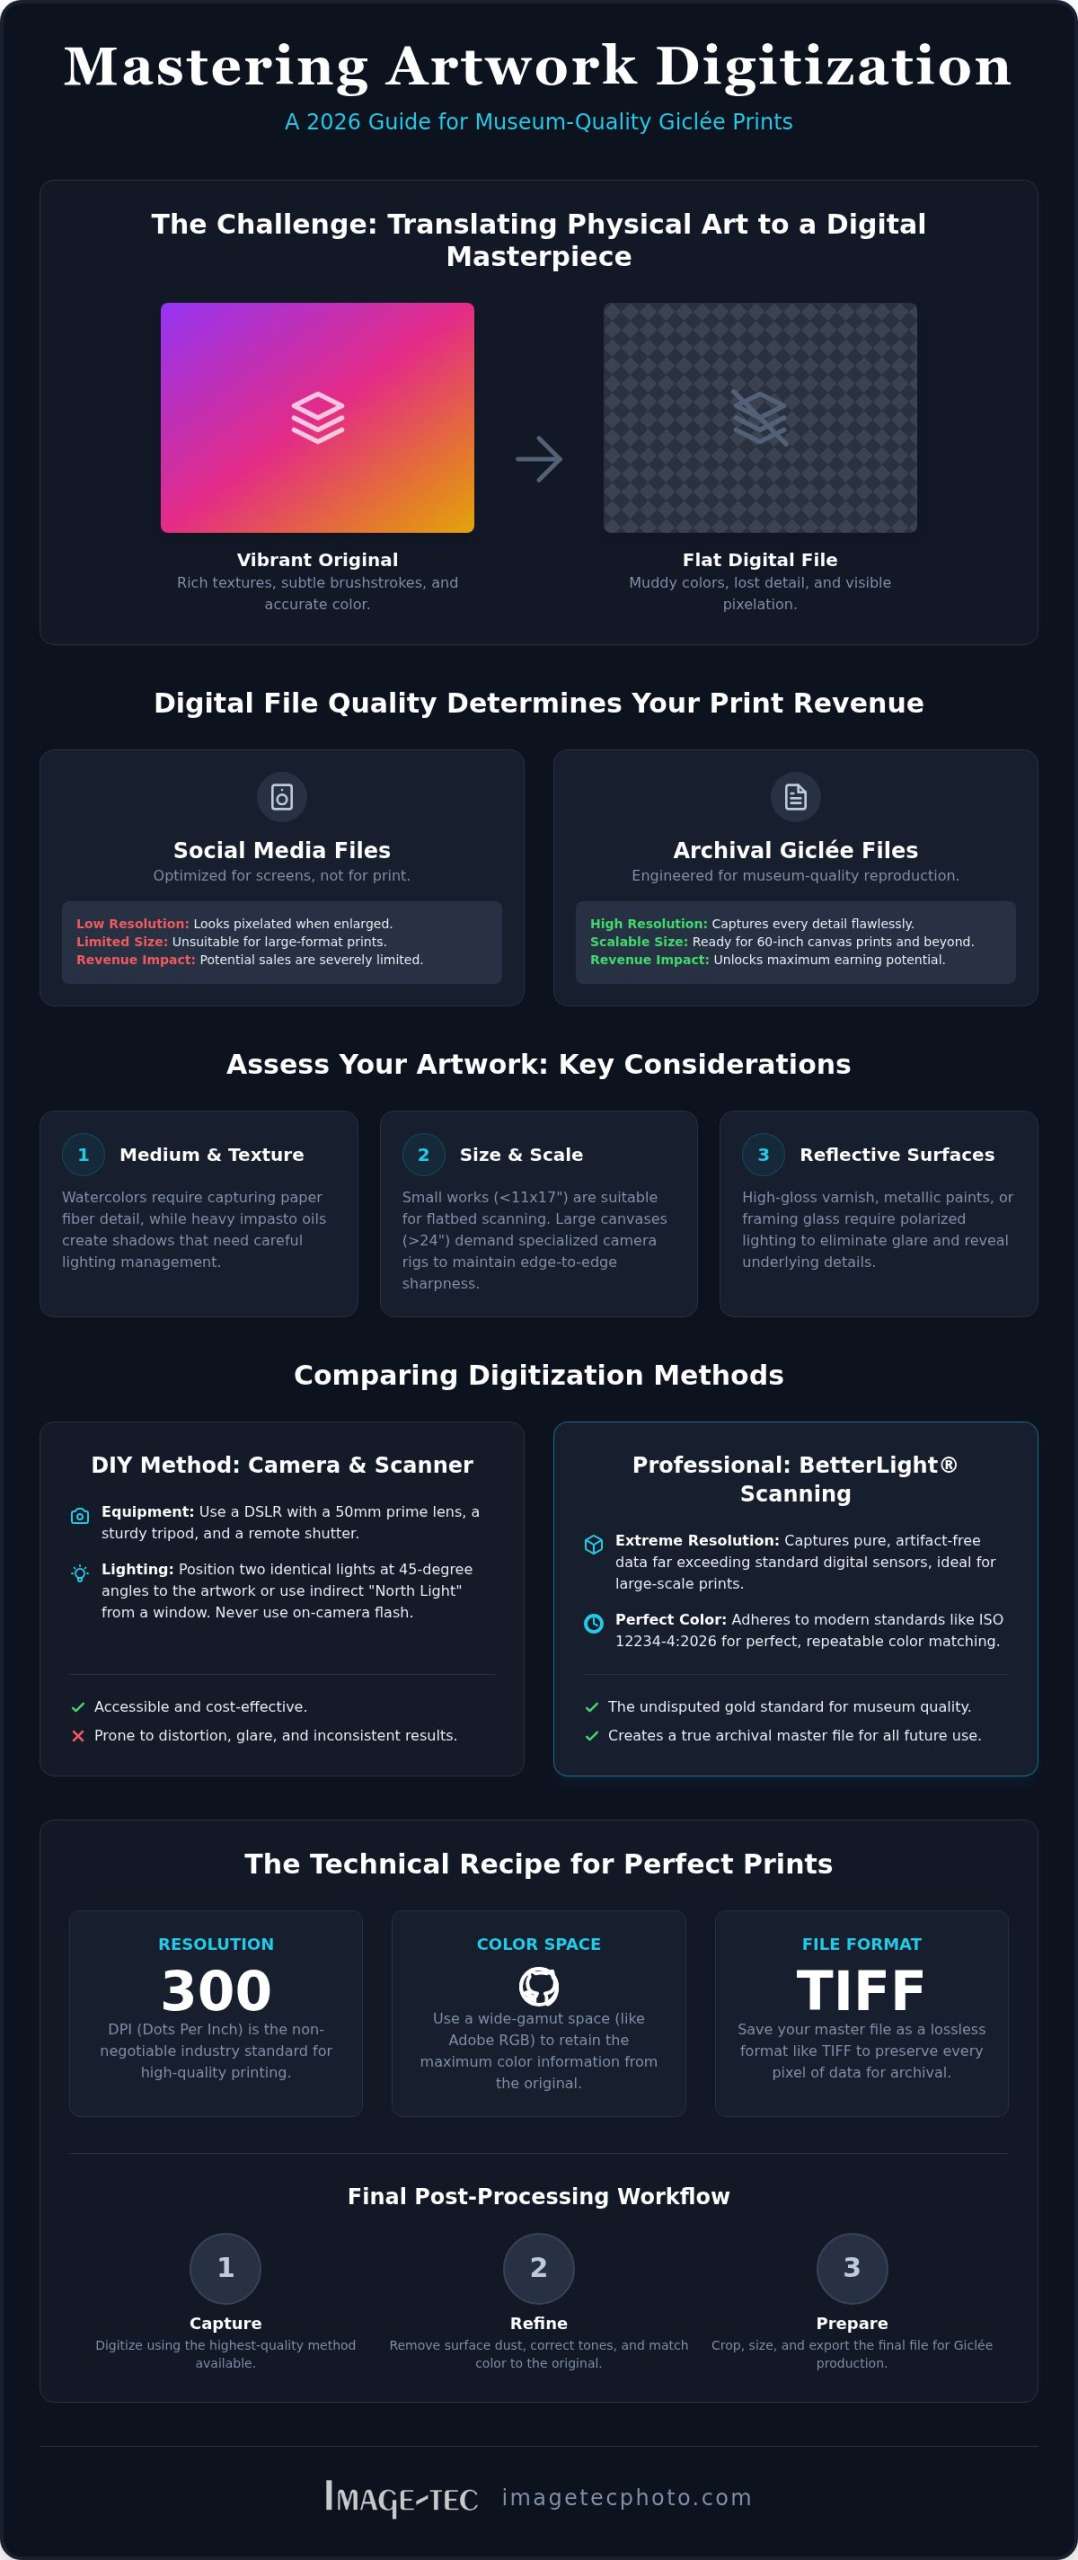
Digitization serves as the essential bridge between a physical masterpiece and the commercial art market. It’s the technical process of translating physical pigment into a data-rich file that retains every nuance of the original work. While a quick smartphone photo might suffice for a social media post, that level of quality fails immediately when scaled for physical production. Understanding how to digitize artwork for printing means capturing the “hand of the artist,” which includes the specific textures, brushstrokes, and subtle imperfections that give a piece its soul.
There are two primary paths for this transition: DIY digital photography and professional scanning. DIY methods often involve high-end DSLR cameras and controlled lighting, which can be effective for smaller works if executed correctly. However, professional scanning remains the gold standard for those seeking museum-quality results. Working with a dedicated studio like The Photography Co ensures that the goal isn’t just to make a copy, but to create an archival record that allows for identical reproduction across multiple formats and sizes.
Why Digitization Quality Determines Your Print Revenue
Resolution is the primary factor limiting your potential print sizes. A low-resolution file might look sharp on a small screen but becomes pixelated and unusable for a 60-inch canvas. In the fine art market, archival quality is a non-negotiable expectation for serious collectors. They seek reproductions that mirror the original’s depth and color accuracy without compromise. This level of precision is defined by what is a giclee print, which serves as the industry benchmark for professionals who prioritize their reputation and revenue. This same dedication to museum-quality output is what distinguishes boutique studios like Just Tina Photography, which apply these high standards to luxury portraiture.
When you evaluate how to digitize artwork for printing, you must first consider the physical properties of the medium. Different mediums require distinct technical approaches. Watercolors often rely on high-resolution scanning to catch the subtle bleed of pigment into paper fibers. Conversely, heavy impasto oils create physical peaks and valleys that cast distracting shadows under standard lighting. Large-scale canvases exceeding 24 inches present logistical hurdles, often requiring specialized studio rigs or advanced scanner photography techniques to maintain consistent focus across the entire surface.
Reflective surfaces such as high-gloss varnish or framing glass add another layer of complexity. These materials require polarized lighting setups to eliminate glare that would otherwise obscure fine details. By assessing these factors early, you ensure the digital file captures the true essence of your work rather than a distorted version of it. A methodical assessment at this stage prevents costly errors during the final printing phase.
DIY Digitization: Flatbed Scanning and Digital Photography
Artists often begin by exploring how to digitize artwork for printing using consumer-grade equipment. While accessible, this path requires a disciplined approach to avoid common errors like keystoning or uneven illumination. Success in a home environment hinges on your ability to replicate controlled studio conditions using specific techniques and tools.
Setting Up Your Home “Studio” for Success
Digital photography is the most versatile DIY method, but it’s prone to lens distortion. You should utilize a 50mm prime lens, often called a “nifty fifty,” because it provides a field of view similar to the human eye and minimizes the edge warping found in wide-angle lenses. For artists documenting their process on mobile, high-quality phone camera lenses from LensLab can significantly reduce distortion and improve clarity, though a professional camera remains necessary for the final Giclée file. Mount your camera on a sturdy tripod and use a remote shutter release to eliminate even the slightest vibration that could soften the image.
Lighting is your most critical variable. The “North Light” rule suggests using indirect natural light from a north-facing window, which remains stable throughout the day without creating harsh, moving shadows. If you use artificial lights, apply the 45-degree rule. Position two identical lamps at 45-degree angles to the art to cancel out reflections and glare. Never use an on-camera flash. Flash creates localized hot spots and flattens the essential textures of your medium.
For illustrations or watercolors under 11×17 inches, a flatbed scanner is often more precise than a camera. Before you begin, clean the scanner glass with a microfiber cloth to prevent dust spots that require hours of digital cleanup later. Always operate your software in “Professional Mode.” This allows you to disable automatic “enhancements” like auto-sharpening or color correction, which often destroy subtle tonal transitions and color accuracy.
Capturing raw data is essential for maintaining the “hand of the artist.” Following established Technical Guidelines for Digitizing ensures your files meet professional standards for color accuracy and bit depth. While you can attempt to stitch multiple scans for larger works, the process is notoriously difficult. Misalignments by even a fraction of a millimeter can ruin a high-resolution print. If you find these technical hurdles are hindering your creative output, professional reproduction services can streamline the process and guarantee a museum-quality result.
Mastering Technical Settings: DPI, Color Space, and File Formats
Establishing the correct digital parameters is just as critical as the physical capture itself. When learning how to digitize artwork for printing, you must distinguish between pixels per inch (PPI) on your screen and dots per inch (DPI) on the final substrate. While many use these terms interchangeably, PPI refers to the digital density of the file, while DPI describes the physical output of the printer. To ensure museum-quality results, the industry standard is to maintain 300 DPI at the final print size. This ensures that every fine detail from the original is represented by a physical dot of ink on the paper or canvas.
Bit depth is another technical pillar that determines the quality of your digital file. An 8-bit file offers only 256 levels of tone per color channel, which often results in visible “banding” in smooth gradients, such as watercolors or soft sky backgrounds. By contrast, 16-bit files offer 65,536 levels, providing the necessary headroom for professional color grading and tonal adjustments. For archival purposes, always save your work as an uncompressed TIFF. Unlike JPEGs, which discard data through lossy compression every time they’re saved, TIFFs preserve every bit of the original scan data. For those managing a large volume of work, following a step-by-step guide to digitizing your art collection can help maintain these technical standards across your entire portfolio.
Choosing the Right Color Mode and Bit Depth
Managing and transferring these substantial, uncompressed files requires a robust digital infrastructure. If you are looking to upgrade your studio’s connectivity to handle high-resolution uploads and professional communication, you can find out more about reliable service options.
Professional digitization begins in an RGB color space, such as Adobe RGB or ProPhoto RGB, because these spaces capture a wider range of colors than a printer can produce. Color gamut is the range of colors a device can produce. While printers eventually convert files to a CMYK ink set, capturing the widest possible gamut initially prevents data loss. ICC profiles act as the essential translator between your scanner, monitor, and printer, ensuring that the vibrant hues you see on screen remain consistent throughout the production process.
Resolution Requirements for Large Format Printing
Scaling a file for a 60-inch canvas requires significant pixel dimensions to maintain clarity. For instance, a 60-inch print at 300 DPI requires 18,000 pixels on its longest side. Attempting to upscale a low-resolution file through software interpolation always results in a “soft” or blurry print because the computer is essentially guessing where to place new pixels. Starting with a high-resolution capture is the only way to meet the rigorous output specs required by a professional fine art canvas printing service. This methodical approach to resolution ensures your large-format reproductions look as sharp as the original work, even when viewed from a close distance.
Professional Reproduction: Why BetterLight Scanning Leads the Industry
While DIY methods provide a starting point, they eventually hit a technical ceiling. When artists reach a stage where they need to scale their business through limited edition prints, the question of how to digitize artwork for printing moves from a home hobby to a professional requirement. Standard digital cameras, even high-end DSLRs, use a Bayer pattern filter on their sensors. This means the camera only captures one color per pixel and “guesses” the rest through interpolation. Professional BetterLight scanning eliminates this guesswork by capturing pure RGB data for every single pixel in the file.
The BetterLight Advantage for High-Resolution Art
A BetterLight scanning back functions differently than a traditional camera. Instead of a single shutter click, it utilizes a linear array that moves across the image area, capturing millions of pixels with extreme precision. This methodical process removes the digital noise and artifacts commonly found in standard sensors. It’s particularly effective for capturing the physical depth of heavy impasto or the delicate grain of fine art paper. Because the sensor captures the entire image area in one continuous pass, it avoids the misalignments often seen when artists attempt to stitch multiple smaller scans together.
Color accuracy is another area where professional studios excel. By using X-Rite ColorCheckers and custom-built ICC profiles, technicians can match the digital file to the original artwork with near-perfect fidelity. This ensures that the deep blues or subtle ochres you painted are exactly what appears on the final Giclée print. For museum archives and high-end galleries, this level of data integrity is the only acceptable standard for historical preservation and commercial reproduction.
When to Move from DIY to a Professional Studio
The decision to transition from DIY to professional services often comes down to a cost-benefit analysis. While home setups are cheaper upfront, the time spent troubleshooting color shifts, uneven lighting, and soft focus can be better spent in the studio creating new work. Professional studios also offer peace of mind through insurance and climate-controlled handling of your original pieces, which is vital for high-value canvases. For artists in the Northeast, seeking out professional artwork scanning in Massachusetts provides access to the technical infrastructure needed for prints up to 60 inches wide.
If you’re ready to elevate your art business with museum-quality reproductions, consider the advantages of a dedicated studio environment. You can schedule a session for BetterLight scanning and Giclée printing to ensure your work is captured with the highest possible precision.
Final Steps: Post-Processing and Preparing for Giclée Production
The digital capture is merely the raw material for a finished reproduction. Once you understand how to digitize artwork for printing, the focus shifts to meticulous post-processing to ensure the final output matches your artistic vision. This stage begins with “digital cleanup” in Photoshop. Even in a controlled studio, high-resolution scans often reveal microscopic dust particles, stray brush hairs, or tiny canvas threads that were invisible to the naked eye. Using the Spot Healing Brush or Clone Stamp tool at 100% magnification is essential for removing these artifacts before they’re magnified in a large-scale print.
Technical adjustments to Levels and Curves follow the initial cleanup. You must set a true black point and a clean white point to ensure the print has appropriate tonal depth. Without these adjustments, the reproduction may appear “washed out” or lack the contrast of the original piece. Soft proofing is the next vital step. By using a calibrated monitor and specific ICC profiles, you can simulate how colors will shift when applied to canvas or cotton rag paper. It’s a necessary precaution because a backlit monitor inherently displays colors more vibrantly than reflected light on a physical substrate.
Color Correction and Proofing for Fine Art
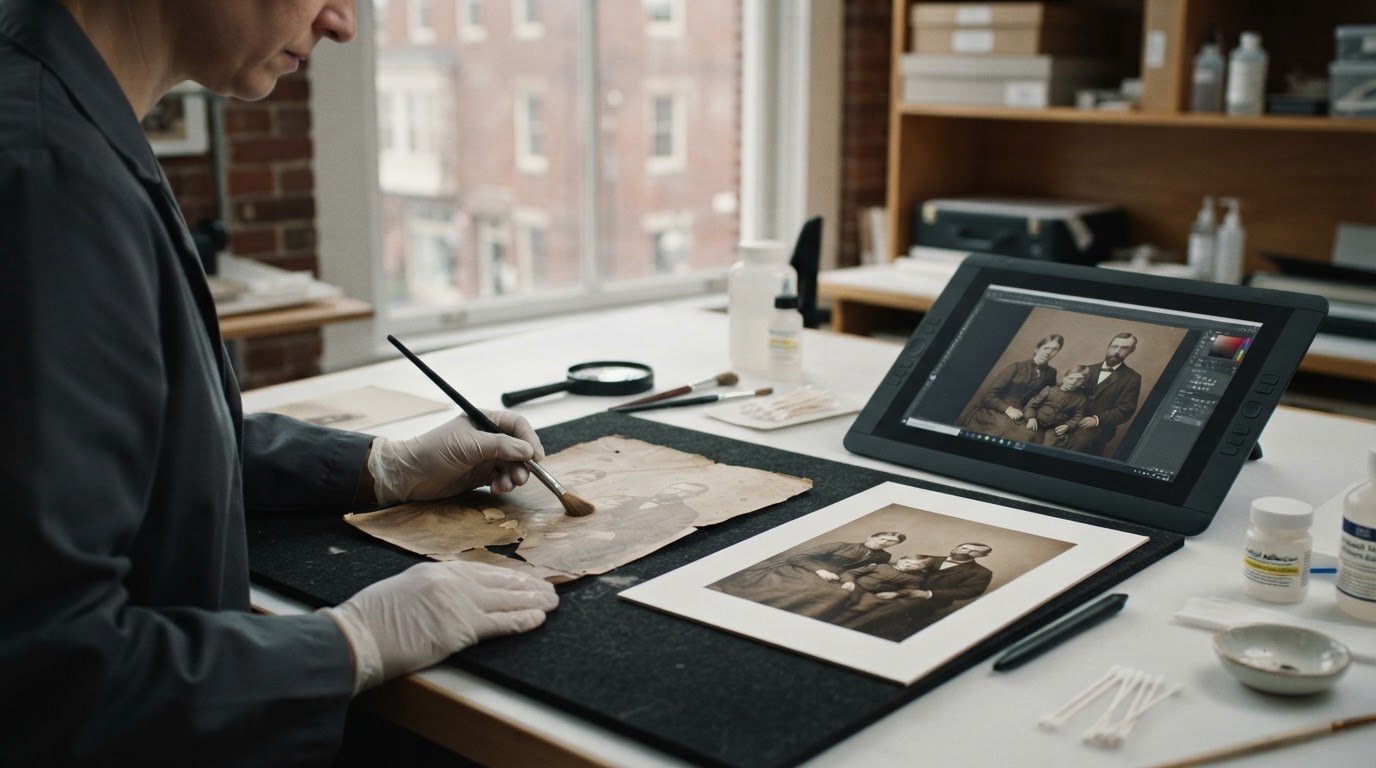
Successful color correction requires a controlled environment. Technicians compare the digital file side-by-side with the original artwork under 5000K “Daylight” balanced lighting to ensure accuracy. You’ll often need to slightly increase saturation or adjust contrast to compensate for ink absorption, as different papers and canvases absorb pigment differently. A common pitfall is trusting the monitor’s brightness; what looks “bright” on a screen often prints significantly darker on a matte surface. A small-scale proof print is the only definitive way to verify these adjustments before committing to a full production run. The same principles of precise color correction and archival Giclée output apply equally to photo restoration and printing on canvas, where damaged historical images demand the same level of technical fidelity as original fine art.
Protecting Your Investment with Custom Framing
The journey from a physical painting to a digital file ends with its return to a physical form. Integrating custom framing for fine art prints is a strategic move that protects the work and increases its perceived value for collectors. Choosing archival mats and UV-protective glass ensures the longevity of the Giclée print, preventing fading from environmental exposure over time. For artists preparing for a gallery presentation, these final touches transform a simple reproduction into a professional, museum-quality product ready for sale. Completing the process of how to digitize artwork for printing with these preservation standards ensures your digital archive serves your career for decades to come.
Elevating Your Portfolio through Professional Reproduction
Mastering the process of how to digitize artwork for printing is a vital investment in your long-term career. We’ve explored the technical foundations, from maintaining 300 DPI at final size to the archival benefits of uncompressed 16-bit TIFF files. While DIY methods offer a practical starting point for smaller illustrations, professional BetterLight scanning remains the industry standard for capturing the true texture and color of large-scale originals without digital artifacts.
A high-quality digital file doesn’t just enable print sales; it creates a permanent, archival record of your creative output. By combining extreme resolution with methodical post-processing and custom framing, you ensure your reproductions meet the rigorous standards of galleries and collectors alike.
If you’re ready to move beyond basic captures, we’re here to help. Get a professional high-resolution scan of your artwork at Image-Tec. Our studio has served artists in Methuen, Boston, and throughout New England since 1994. We utilize BetterLight scanning technology for museum-quality capture and offer a complete solution including Giclée printing and custom framing. Your craftsmanship deserves a reproduction that reflects its original brilliance.
Frequently Asked Questions
What is the best DPI for digitizing artwork for printing?
The industry standard for high-quality printing is 300 DPI at the final output size. If you intend to print a 20-inch painting at its original scale, your digital file must be 6,000 pixels on its longest side. For artists who require extreme detail or plan to enlarge their work significantly, 600 DPI is recommended. This provides the necessary pixel density to ensure every brushstroke remains sharp during the Giclée production process.
Can I use my iPhone to digitize my paintings for professional prints?
Modern smartphones are excellent for social media but remain unsuitable for professional art reproduction. Small sensors and wide-angle lenses introduce significant edge distortion and digital noise that become visible when printed. The Bayer pattern interpolation used in phone cameras cannot match the pure data capture required for museum-quality Giclée prints. For those learning how to digitize artwork for printing, a dedicated scanning back or a full-frame DSLR is essential for achieving archival results.
What is the difference between scanning and photographing artwork?
Scanning utilizes a linear sensor that moves across the artwork to capture data point-by-point, resulting in extreme resolution and zero lens distortion. Photographing is often faster but relies on a fixed sensor that is prone to perspective errors and uneven lighting. Professional BetterLight scanning provides a significant advantage by capturing pure RGB data without the artifacts found in traditional digital photography. This makes it the preferred choice for preserving the “hand of the artist” in large-scale reproductions.
How do I avoid glare when photographing a glossy oil painting?
To eliminate glare on glossy oil paintings, you should utilize the 45-degree lighting rule. Position two identical light sources at 45-degree angles to the artwork to cancel out reflections. For particularly stubborn varnishes, professional studios employ polarizing filters on both the lights and the camera lens. This cross-polarization technique effectively removes “hot spots” while maintaining the rich tonal range and saturation of your pigments. It ensures the texture remains visible without distracting light bounces.
Should I scan my artwork in RGB or CMYK mode?
You should always scan your artwork in RGB mode, specifically utilizing a wide color space like Adobe RGB or ProPhoto RGB. RGB captures a much broader range of colors than the CMYK ink sets used in printing. Capturing this extra data allows for more precise color grading during post-processing. The conversion to CMYK happens at the final printing stage using specific ICC profiles. This workflow ensures you don’t lose vibrant hues early in the digitization process.
How do I digitize a painting that is too large for my scanner?
If your artwork exceeds the dimensions of a standard flatbed scanner, a professional studio with a large-format scanning rig is the safest solution. While you can attempt to stitch multiple smaller scans in Photoshop, even a fraction of a millimeter in misalignment can ruin the final print. Professional BetterLight systems can digitize artwork for printing on canvases up to 60 inches wide and beyond. This non-contact method ensures the entire surface remains in perfect focus and color alignment.
What file format should I save my digitized artwork in?
The professional standard is to save your digitized artwork as an uncompressed 16-bit TIFF file. This format preserves all the original scan data without the lossy compression artifacts found in JPEGs. For archival purposes, you might also consider the DNG format, which follows the ISO 12234-4:2026 standard for raw digital image data. Maintaining 16-bit depth is crucial because it provides over 65,000 levels of tone, preventing banding in soft gradients and subtle watercolor washes.
Does digitizing artwork damage the original painting?
Professional digitization does not damage the original painting when handled in a controlled studio environment. Professional scanning backs are non-contact; nothing touches the surface of your canvas during the capture process. If you are using a home flatbed scanner, ensure the glass is completely clean and free of abrasive debris. Studios also utilize climate-controlled settings and archival handling procedures to protect your investment. This is especially important for delicate historical restorations or high-value contemporary works, where the same BetterLight scanning technology used for fine art also powers professional photo restoration and printing on canvas to bring damaged family heirlooms back to life.




Leave A Comment
You must be logged in to post a comment.